 |
Rick Anstine
Shows You How to Make an Incubater
First, I looked
at all the other DIY (Do It Yourself) incubators on BYC (www.backyardchickens.com).
Then I looked at my cooler collection. I decided to turn my decades-old
Coleman Model 5640 cooler, that I know heats, into the incubator, spending
as little as possible. You can also find good deals on Craigslist for similar
coolers/heaters.
|
|
 |
Preparing
the Cooler and Fan
Remove the door seal and make a latch shim to crack the door open. After
testing, it ended up 3/32” thick. You need a shim so the incubator has a
little ventilation. The eggs need some fresh air.
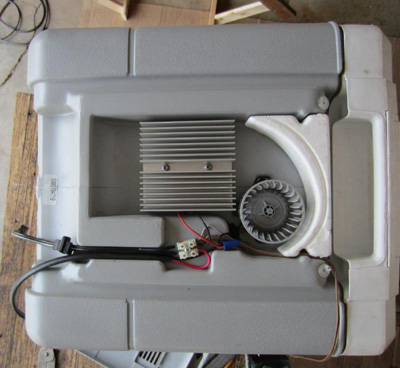
Turn cooler upside down and reverse the polarity
of the heat sink fan for operation in heat mode.
|
|
|
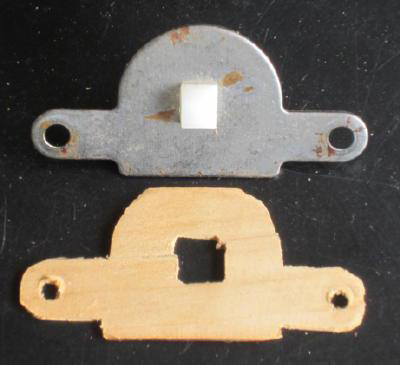
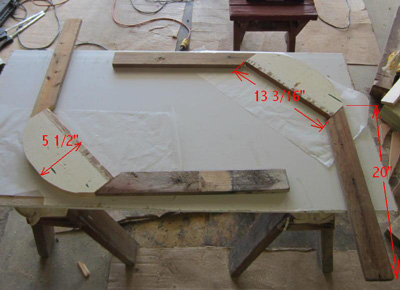
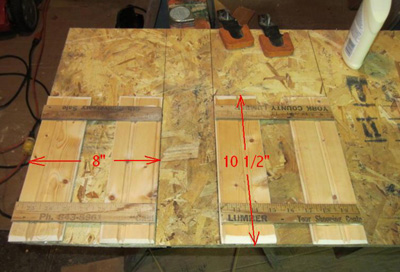
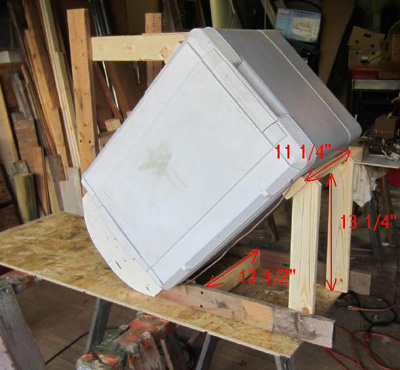
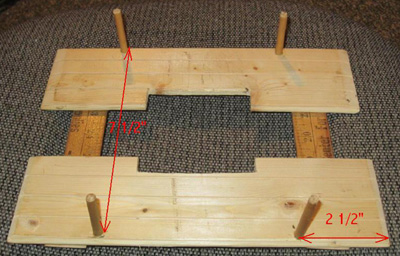
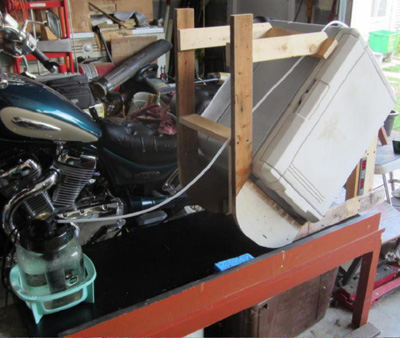
Make a Cradle
to Turn Incubator
The easiest
way to turn the eggs is turning the whole cooler, so you need to make cradle
legs and rack. The angle is 45 degrees for each of the 2 directions it will
lean while eggs incubate.
This prevents the chick/duckling from sticking to the shell. You turn 2-3
times a day. |
|
 |
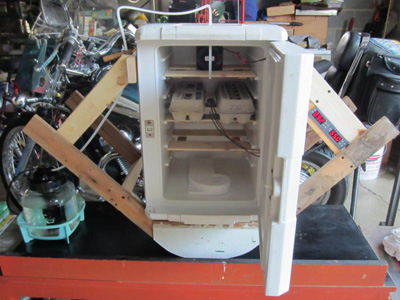
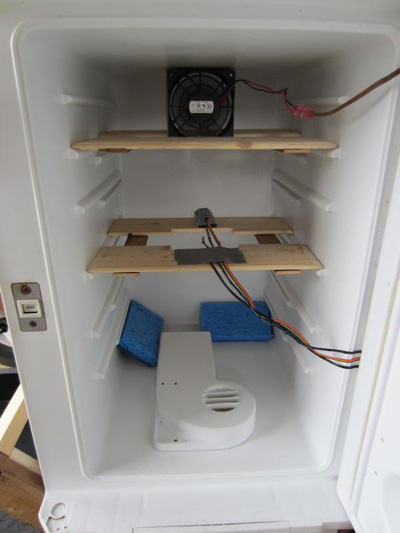
Shelf
for Egg Cartons
I added four 1 ľ” long, Ľ” dowels to keep the egg cartons from sliding inside
the incubator. The square hole in the shelf in the cooler was just a fan
experiment (see last photo). |
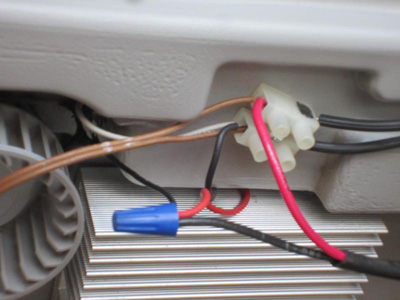 |
Attaching
Incubator Fan
Fasten to the top shelf a computer-power supply fan blowing toward the door.
Turning it upside down messes up the original shelf slots. See last photo
of inside the cooler.
|
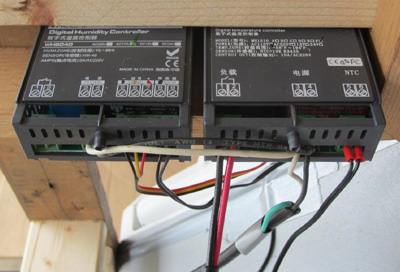 |
Temperature
and Humidity
Make a holder
outside the incubator for a Temperature (about $14.57 on Ebay) and Humidity
Controller (about $29.99).
Wire it all up. Black from heat sink to positive, white from OEM (original
equipment manufacturer) fan to positive. Wire computer fan to positive and
negative – runs all the time. Black OEM fan and red from heat sink (5 amp)
through temperature controller with 14 gauge wire. |
 |
Test Your
Incubator Sensors
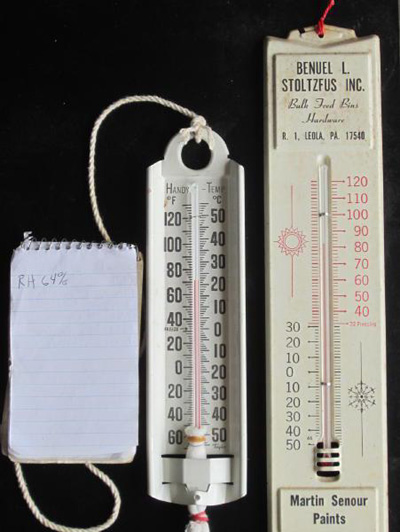
Calibrate
and test it. You need accurate dry and wet bulb thermometers, humidity chart,
and what local weather says. Local weather said 64%; my Sling Psychrometer
said 65%.
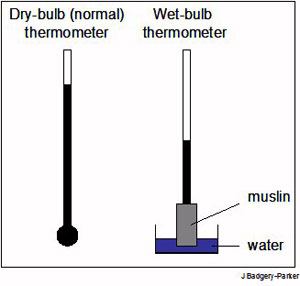
A Sling Psychrometer has two thermometers. It measures air temperature and
"wet-bulb" temperature. They are used to calculate the dewpoint
temp, and therefore relative humidity. |
 |
Finding
Relative Humidity
A homemade
Sling Psychrometer works instantly just like one of these $40 Bacharach
Sling Psychrometers. You just wrap a regular thermometer bulb with gauze,
make it wet & spin it. The dryer the air, the colder it gets. |
 |
Wet Bulb
and Dry Bulb Thermometers
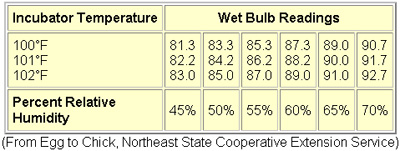
You can buy a Wet Bulb / Dry Bulb Hygrometer to test your relative humidity.
I had to adjust the humidity controller calibration to +6 to get the right
reading. And I had to raise the temperature controller calibration +2 degrees.
|
|
Test Your
Humidity Levels
Tape
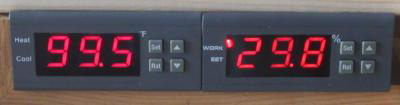
the sensors in place inside the cooler. Close the door and run a test.
My humidity dropped from 65% to 29.8% at 99.5 degrees. I can't believe it
dropped that much. Humidity is weird stuff. I added two soaked sponges.
48.8% is all the sponges could do so I have to add more water.
|
 |
Adding Humidifier
I
looked around for a humidity supply and chose the Hankscraft humidifier
that has been sitting on a night stand in my childhood bedroom since I was
born in 1958.
I got a 3/16” nylon barb splice ($1) and cut the barbs off one end. It fit
perfectly in the original hole. It’s just two metal plates Ľ” apart in a
Bakelite tube and starts to steam in 30 seconds. I took it apart and cleaned
the plates. Works perfectly. Isn’t 1950s tech great!
|
 |
Maintaining
Humidity
I think the incubator gets up to 99.5 degrees in 4 to 5 minutes. Once the humidity drops below 50%, and the humidity controller turns on the humidifier, it only takes a couple minutes to bring it back up to 55%.
|
 |
Your Own
DIY Incubator
Drill
a Ľ” hole in the center of top handhold of cooler for tube to fit through.
Reposition the tube when you turn the eggs to keep it drip-free so condensate
can’t collect.
The fan is the black box at the top. Sensors are on the middle shelf.
Put your eggs in the dozen egg cartons. This incubator holds 6 dozen (72)
eggs. I only spent about a total of $70 to build it.
Thank you Rick from Pennsylvania for your creative ideas.
If anyone else has incubation ideas and photos, let me know. -Nancy
|