Homemade Incubator
#2 for Poultry Eggs by Kirk
Good for Chicken, Duck, Turkey Eggs
Holds 2-3 Dozen Eggs, Low Cost $100
Build your
own incubator and save money.
Also check out: Rick's
Homemade Incubator.
Other
Homemade Incubators.
 |
Kirk
Hodge Shows You How to Make an Incubater
"Most
of the parts and pieces were found around my house. The controller is the
most expensive piece but can be used for other uses when not being used
in the incubator."
"The incubator could probably hold around 2 to 3 dozen
eggs but it might get a little crowded. Thanks, Kirk Hodge, kirk.hodge@gmail.com"
|
Building
Your Own Hatching Egg Incubator
Kirk describes how he built his incubator:
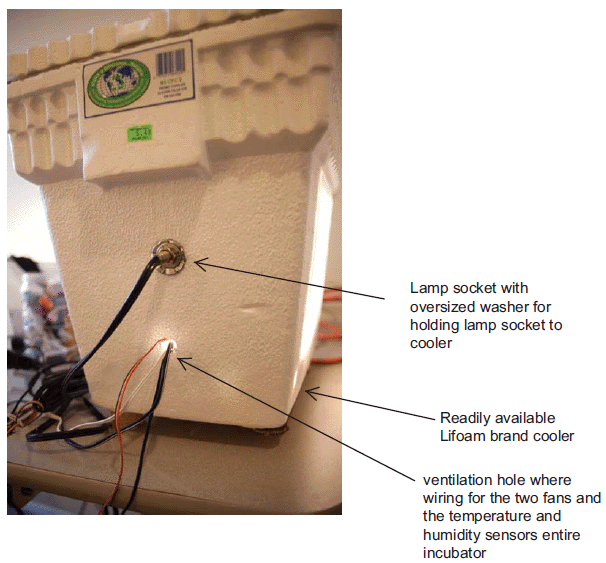
"The incubator
basically consists of 1 beer cooler, 1 temperature/humidity controller,
2 computer fans, 2 12volt transformers to power the fans, some various wiring
and connectors, some 1/4" wood strips, some plexiglass and silicone, some
aluminum pans with lids from the baking isle and some aluminum foil."
"I had everything already except I had to buy the controller and one more
12v transformer. The controller is the most expensive part at $50, and I
plan on using it for other projects. But everything could probably be bought
for under $100 and easily handles 14 eggs. I think it is more reliable than
manufactured units for about the same price, at least from what I have read
online about other ones."
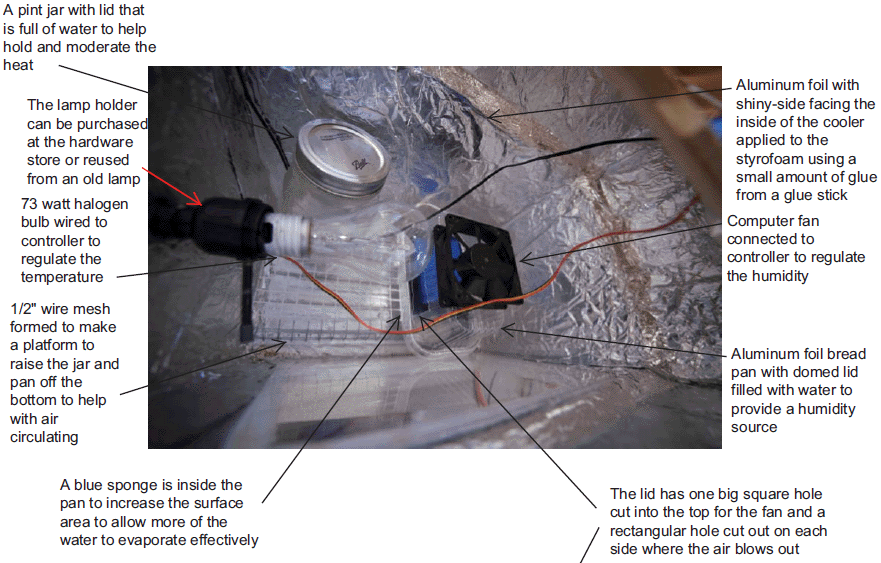
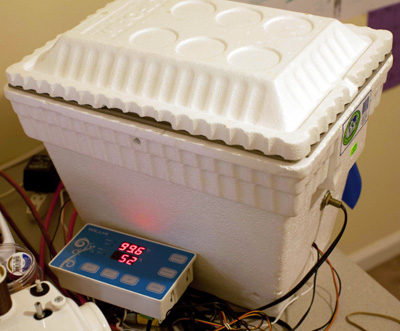
"It is a beer cooler with a 73 watt halogen bulb for heat and a pan of water
for humidity. I wired a temperature and humidity controller (which is sitting
in front of the cooler on the table) that regulates the light bulb and also
separately regulates a fan that sits over the pan of water."
"In the photo the controller is reading 99.6 for the temperature and a humidity
of 52%. The controller turns the bulb off at 100 degrees and back on at
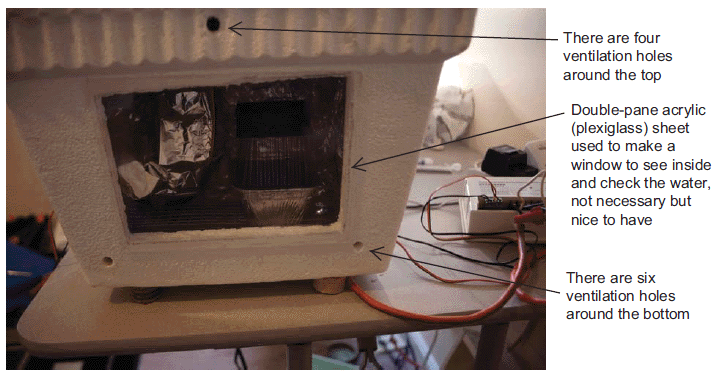
99. It turns the fan off at 56% and back on at 52% humidity. There are four
small holes at the top, one is visible in the picture above the controller,
and another four small holes in the bottom to let in fresh air."
"I cut a hole on one side of the cooler and siliconed on two panes of Plexiglas
to make a double pane window to be able to see inside to check the water
level and to see if the light was working. The humidifier consists of a
pan of water which came with a plastic lid that I cut some slots in to allow
the air to circulate from the fan on top of it. The pan has a blue sponge
in it to allow more water to evaporate and the pan sits on some wire mesh
just to get it off the bottom of the cooler."
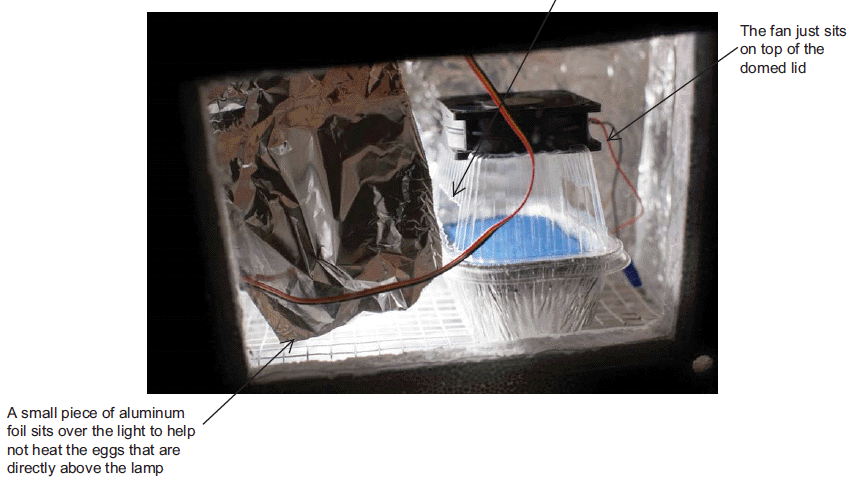
"The light bulb is behind the
piece of aluminum foil which is there to help not heat the eggs that are
right above it. I have a big plastic straw that I use with a funnel to add
more water to the pan when it is needed so the eggs don't have to get disturbed
too much."
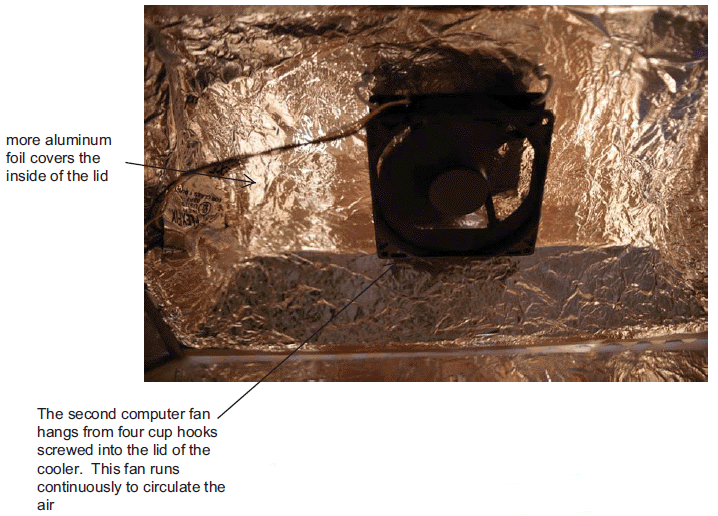
"I made a little wooden platform for the eggs to sit on. There is also another
computer fan that is suspended from the lid with some cup hooks that continuously
circulates the air inside. I also covered everything on the inside with
aluminum foil to help keep the heat in."
"When they start to hatch I made a Plexiglas lid to be able to see inside
without losing too much heat and I have some wheat straw to put down over
the wood. We turn the eggs by hand and it heats up quick once the lid is
back on."
Thank you Kirk from La Vergne, Tennessee for showing us how to make our own incubator.
-Nancy
|
|